This new feature allows businesses to set up a single online store and have their clients access it on both Facebook and Instagram. Businesses can set up their entire inventory and create various collections and featured products to showcase their merchandise. Zuckerberg also announced that in the near future Facebook would allow businesses to sell their products via Messanger, Whatsapp, Instagram Direct Messages and Tagged products. Finally, Facebook will also be introducing Loyalty programs. They are testing ways to connect the business’s loyalty programs directly with their Facebook platforms.
Facebook Shops were rolled out in the United States on May 19th. We can expect the new features to roll out in Canada and other countries in the coming months.
This shift was put in place after Facebook’s State of Small Business Report was completed. Facebook reported that small and medium-sized businesses in the United States were significantly affected due to the COVID-19 crisis. “According to the survey, 31% of small and medium-sized businesses have shut down in the last three months”.
The new Facebook shop feature appears to be the beginning of an e-commerce shift for the Facebook family of platforms. Facebook is currently testing a Checkout option that is only available to invite-only businesses in the US. It allows the participants to conduct transactions within the platform. Considering how popular Facebook Marketplace has become in recent years, we expect Facebook users to adopt the new Facebook Shop feature quickly and with ease. You can read the full Facebook announcement here
WHAT DOES THIS MEAN FOR YOUR BUSINESS?
Publishing your inventory of products and services on your Facebook shop will expose your business to current followers as well as potential clients. While we are waiting for the new checkout feature to become available in Canada, we can begin by creating a Facebook shop in our current Facebook business accounts.

HOW TO START FACEBOOK SHOPS?
STEP #1
Click the Shop button from the navigation list.
STEP #2
AGREE TO THE MERCHANT TERMS AND POLICIES & SELECT CHECKOUT METHOD
Be sure to read the terms and conditions. These include important information on what items you are allowed to sell, what to do in case of dispute, return and refund policies.

STEP #3
SELECT CHECKOUT METHOD
Once you agree to term and condition select your shop’s check out method. If you have an e-commerce shop such as Shopify or Etsy click checkout on another website, otherwise choose message to buy.

STEP #4
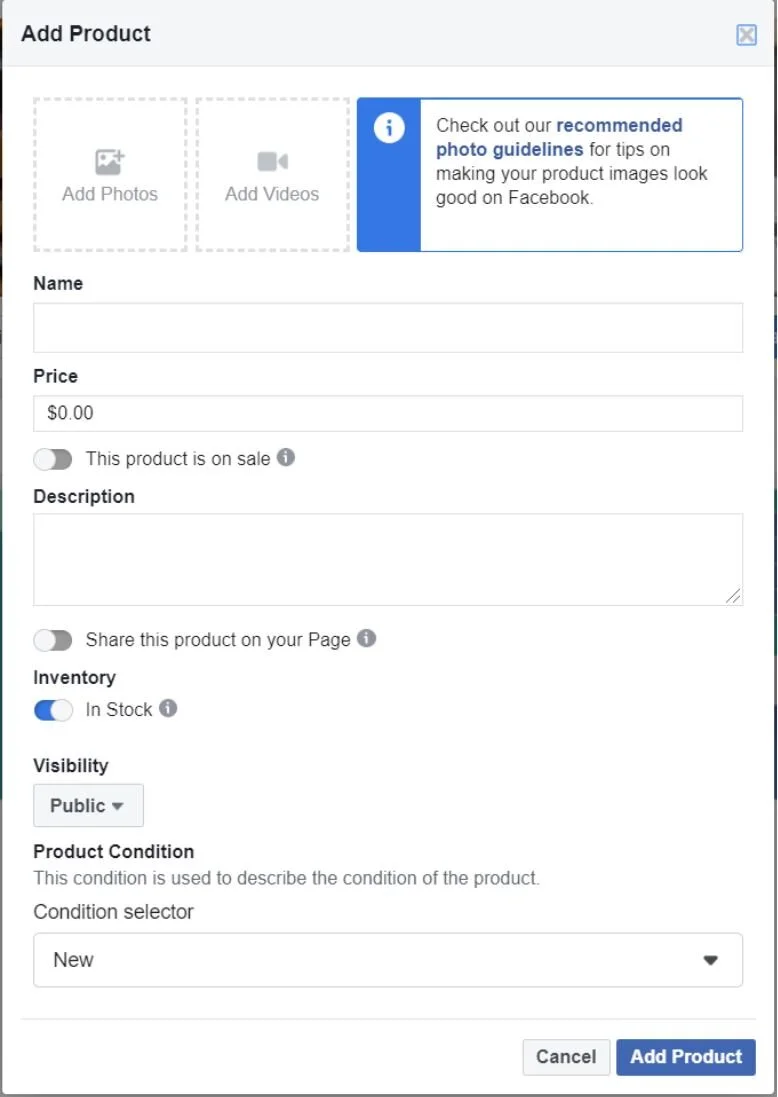
CLICK ADD PRODUCT TO YOUR SHOP
Now that you are ready to add your inventory in your shop click the Add Product button.
You are now able to add the following details for each product.
Facebook requires the following for each listing:
-
Product images. Each product requires at least one image.
-
Product titles. Make sure to use accurate product titles and avoid keyword stuffing.
-
Product descriptions. Descriptions should be in plain text and use correct spelling, grammar and capitalization.
-
Product variants, such as products that come in different sizes or colors.
After adding a few products in your shop, Facebook will go through an “In review” process similar to how Facebook Ads are managed. When all your inventory in your shop is approved, it will begin to look like this;
STEP #5
CREATE A COLLECTION
To better organize your products, you are able to add multiple collections in your Facebook shop. Start by clicking the Add Collection button that appears under the All Products section.
You will be directed to a new page in Business Manager where you can add a collection to your shop. Click Add Collection on the top right corner.
Give your collection a name, and choose collection visibility; Public, or Unpublished. The default setting will be on the public view.
You can choose to feature the collection which will place it at the top of your shop and show larger images. You can only have one feature collection at a time, so choose wisely.
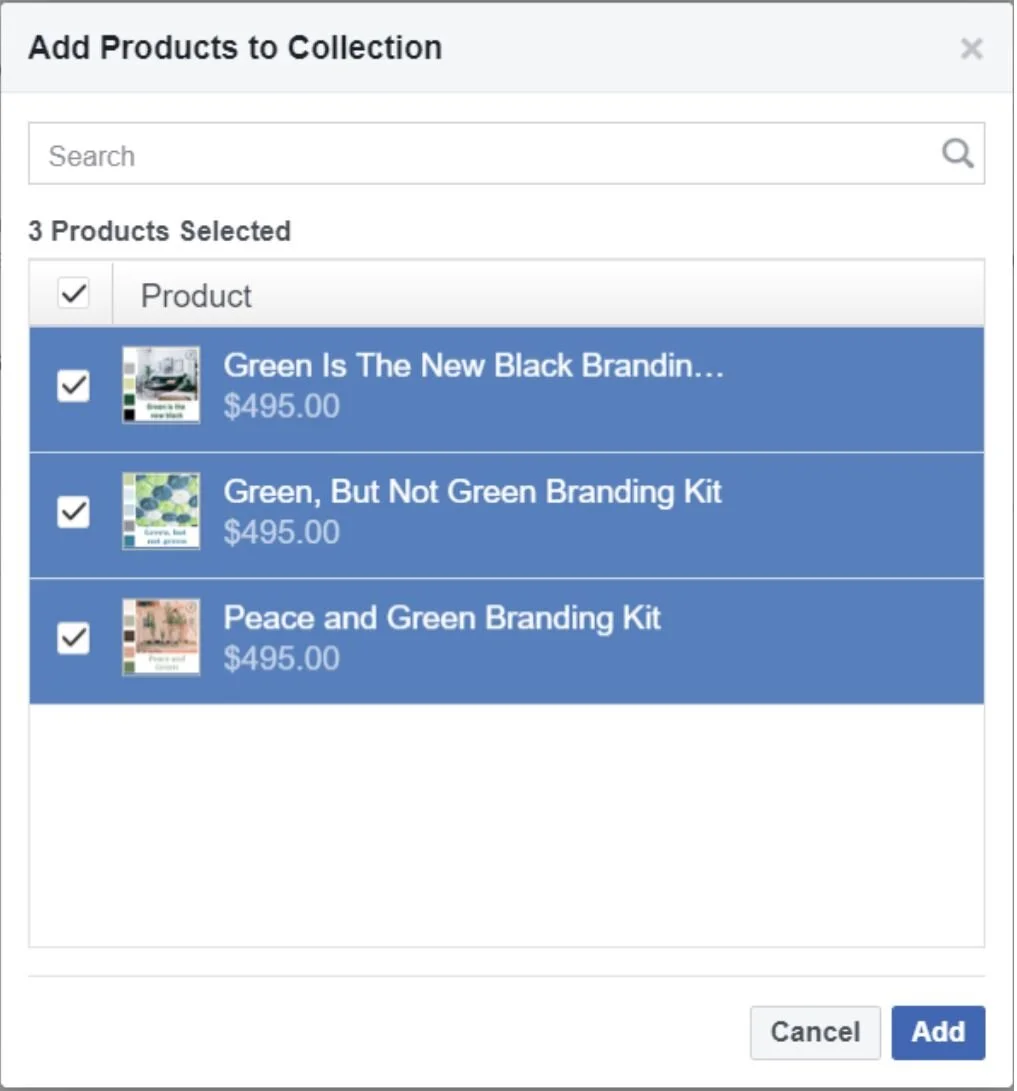
Click on the Add Products button to select which of your products will be positioned in the collection.
Select all products that will be featured in your collection and click Add.
Your collection will appear on top of your shop page in the order that you have arranged them.
STEP #6
MANAGE YOUR SHOP AND ACCESS YOUR SHOP SETTINGS
You can access your shop details and manage your listings by clicking on the button near the top right of the page where your shop description is.
Your shop listing is now completed. Your audience can message you to get in touch or you can have your listings be directed to your e-commerce platform where the listing is published. Now you are ready for when the checkout feature is released.

PRO TIP:
By Introducing paid Facebook ads, your products will have the opportunity to be viewed by a niche and a better-suited audience. Only 25% of businesses on Facebook use paid ads to reach their potential clients. With over 2.6 billion active users on Facebook each month, this creates a vast opportunity for businesses who understand their audience and have developed the appropriate social strategy to reach their ideal consumer. For more information about how to establish your ideal client profile and introduce a social paid campaign, reach out to our team today.


